Matson’s Landing in L-Gauge – Truckin’ Along

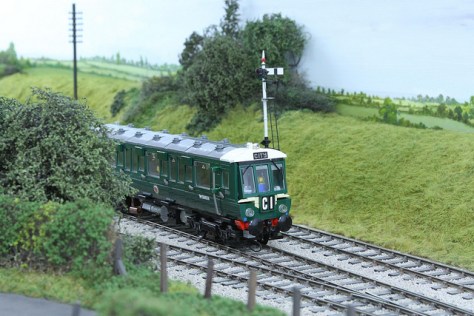
If you’ve been following the Matson’s Landing in L-Gauge series here on BMR, you’ll recall that I’ve settled on both a prototype, a Series B Climax locomotive, and a scale of 1:33, which works out to roughly 8 studs wide. With the initial high-level requirements defined, it’s time to start working on the actual brick design of the motive power.

When I studied architectural design back in college, one of my favorite professors had a saying: “Form follows function.” What he meant by this was that a pretty design isn’t useful if it doesn’t work. This is especially true when it comes to designing things that move, such as locomotives. If I built a gorgeously detailed locomotive that can’t run on a track, it’s not very effective for a working layout. With this in mind, my first task is to build a functional drive system. Once I know that I have something that performs reliably, I can then work on making it look nice.

The drive system of the real-life Climax locomotive actually lends itself very well to being replicated in LEGO form. A main axle below the locomotive turns gears that drive gears connected to each axle of the locomotive’s trucks, or bogies. Power is therefore transferred from the engine to each of the four wheel sets. For my first attempt at a bogie design, I set out to replicate this setup.

LEGO Scalar measurments of Climax truck
View of truck gearing from the Climax Locomotive Catalog

My first step was to take measurements and notes of details of the Climax trucks using the plans that I had found in Model Railroad Craftsman. The side frames of the trucks measured about 7 studs along the top edge, and 5 along the bottom edge. The trucks are assembled from iron bars, angled from bottom to top, with springs on the bolster and both journal boxes. Looking back at the Climax Locomotive Catalog, I found an image of the interior of the truck. It shows bevel gears on each axle, rotated opposite each other, driven by smaller bevel gears along a center axle. With this information, I sat down and started building. Some people work better building virtually at first, then translating to brick. I tend to work in the opposite direction, especially for pieces that have to move. I build first, then document what I’ve built using MLCad.

When I build, I use a process that the website development industry calls “iterative design”. Basically, you create a design, test it, refine it, test it again, and so on, until you come up with a finished product. For this project, I tried to document each iteration for you. This process took a few days, with each new design being slightly better than the last.

Version 1 – Basic Design

For the first iteration, I focused on replicating the prototype truck as closely as possible. I thought the overall design came out well. It was a bit over sized, but it had the basic look of the iron bar trucks with springs, and the gearing also matched the prototype. Testing, however, showed a huge issue very quickly. At 1:33 scale, the locomotive’s base would be about 28 studs long. With a truck on each end, there would not be enough room between the two to fit the axles and universal joints needed to drive the axles, and still allow the trucks to pivot.

Version 2 – Space for U-joints

For the second iteration, I kept the look of the outer frame, but redesigned the interior of the truck to remove one set of gears. This means that the locomotive would be driven more like a Heisler locomotive, with power to only one axle per truck, but allowing for much more room for the universal joints. During testing, these trucks worked well on straight trucks, but caught on switch points or uneven track. The bottom of the side frame needed to be raised by one plate to allow for more clearance.

Version 3 – More clearance

Version three of the Climax trucks turned into an almost complete redesign. This version uses a Studs-Not-On-Top (SNOT) approach, which allowed me more clearance at the track level. The change of design also allowed me to shorten the side frames to be closer to the prototype measurement, but still keep the spring detail. This version was also more solid, with no parts falling off while running. It does lose some of the iron bar look, but the overall angled shape remains. I found it to be a good compromise between function and form (remember: Form follows function). Track testing found this design to run well on straights, curves, s-curves and through switches.

Version 4 – Less clearance

Climax truck Version four was a slight redesign of the bolster section, purely for cosmetic reasons. Version three left just a bit too much space between the bottom of the locomotive base and the top of the truck frame. While functionally it worked, I wanted to lessen the space to make it look better. I was able to remove a single plate of height, which brought the measurement between the base and trucks closer to the scaled prototype.

Version 5 – Final?

Finally, we have the last iteration, Version five. While testing Version four, I found that the inverted plates on the trucks, when running through curves, were catching on the edges of the locomotive base that I’ve been using. I tried using inverted tiles on the ends of the bolsters, but found that these caught as well. The final solution was to use part 2654, Slide Shoe Round 2×2, to act as slides, keeping the space between the truck and the locomotive base, but allowing the trucks to pivot without catching.

Next up, I’ll start working on the locomotive’s main drive system.

Taking it to the next level – Corfe Castle Station

After the previous post on Ararat 1972 and Cale’s piece on Brick Model Railroading as such, I think the pieces are now set for the next installment in the series of inspiring layouts: Corfe Castle Station by Carl Greatrix. Lately, Carl has been the guy who has brought you the Caterham Seven and a lot of the visuals in the recent Lego games, but next to this, he is also a real trainhead and a lover of Scale Modelling. With the Corfe Castle Station layout, he had decided to fuse both of these to create an unique layout.

Corfe Castle Station – the eye-catcher and starting point of the layout
The (almost finished) layout at STEAM 2011

The first thing that you notice when looking at Corfe Castle Station is that it follows a typical “British” approach. At least, that’s how it looks like for me after having read so many British Model Railroading Magazines (like Railway Modeller) when I was young. This means that we are looking at two mainline tracks and a siding, with a station as the main visual element. In fact, it’s just a very big diorama. The layout is an oval of which more than half is the fiddle yard and thus not part of the diorama. So, just as with Ararat 1972, there is no large yard where you can show off your trains. However, it does have two continuous loops which are ideal to show of your trains in high speed!

Overview of the layout – Two ovals and a fiddle yard.

What sets this layout apart of most other Lego Railway layouts is the design choices he makes: instead of using studs everywhere, Carl uses Scale Modelling techniques for making roads, gravel and mountains. This means that not everything in this layout is made out of Lego! The effect works surprisingly well. Instead of looking like a layout made of Lego, this is a layout that uses Lego as one of its mediums.

An example of combining Lego with scale modeling techniques

It becomes even more interesting when inserting his trains. This is because Carl, unlike most Lego Train builders, tries to use as little selective compression as possible. The result are models that are so accurate, that they don’t even look out of place in an actual O-scale layout.

Carl’s trains in an O-scale layout. Not part of Corfe Castle, but too nice not to show.

As said, the layout not only uses Lego. Carl was nice enough to keep a diary over at Flickr in which he shows how he designed the whole layout.  This gives us the great possibility to dive a bit deeper into the layout and the way how it’s build.

Continue reading Taking it to the next level – Corfe Castle Station

Are we real model railroaders?

When I woke this morning I had planned to write an article about a very different subject. But upon opening my Facebook feed I was greeted with a post I made on my wall 5 years ago, concerning the topic of “Are LEGO® Trains considered real model trains?” The post was spurred by a Eurobricks discussion going on at that time. Bellow is my entire post on the subject from January 2012 (excuse the typos). I found it very interesting to see what my thoughts on the LEGO train hobby were back then, compared to where we are now.

Continue reading Are we real model railroaders?

Lewiston Branch: Layout Plan

Continued from The Lewiston Branch in L-Gauge: Introduction

My next challenge was turning 7.5 miles of branchline into a realistic, operating, achievable layout plan.  As with any era-specific model railroading project, I started with my historical references.  In this case, primarily the Robertson and Davis’ book Grand Trunk 713 and the Lewiston Branch, but also Grand Trunk Heritage by Philip R. Hastings and Grand Trunk in New England by Jeff Holt.  These were filled with images of trains operating in various points along the line and gave me ideas for the “scenes” I wanted to model along the line.  Most of the line and places I want to model from the 1950s are still here today and I could turn to Bing to help me out.

1. Danville Jct. 2. Lewiston Jct. 3. Littlefields Crossing 4. MEC Overpass 5. Auburn Depot and Androscoggin River Bridge 6. Lewiston Yard

I was able to identify 6 scenes that appeared in historical photographs and I think really captured the essence of the line.  The idea is that any observer familiar with the branch could look at these places arranged together and identify the railroad I was trying to model without any explanation. I’m trying to keep the layout achievable, so for the near future I’m going to focus on the following two scenes:

Littlefields Crossing

Aerial view of Littlefields Crossing in Auburn, ME

The branch crosses a 120’ truss bridge over the Little Androscoggin river.  In the early 1900s until the 1930s an electric tram service, the Portland Interurban Line, crossed the Grand Trunk tracks and over a stone arch spanning the river.  The line was abandoned and a truss road bridge erected next to it, however the stone arch of the Portland Interurban is still there today and is used to carry pipes over the river.

If anyone knows a good technique to model an 80-stud wide stone arch like this, I’m all ears.

StreetView of the Littlefield’s Crossing bridge from Hotel Rd. The vegetation in the foreground is the stone arch of the Portland Interurban.

The Lewiston Yard

1. Lewiston Depot 2. Swift Meat Packing Plant 3. Freight Shed 4. Store House (Platform?) 5. Enginehouse 6. Armour and Company Meat Packing Plant 7. Freight Transfer Platform 8. Freight Transfer Platform 9. Hall and Knight Hardware Company Shed 10. Shed 11. Cross and Company Grain Mill 12. Max Millar Scrap Company 13. JB Skinner Coal Shed and Trestle 14. US Bobbin Company Shed 15. Oil Tanks 16. Lewiston Handle Company

As you can see from the yard diagram I’ve reproduced on the Bing map, the Lewiston yard was full of industries and operating potential.  It could be (and may very well turn out to be) a layout in itself.  There’s plenty of demand for all sorts of rolling stock whether its boxcars, refers at the meat packing plants, gondolas at the scrap company, tankers for the oil tanks, or hoppers at the coal trestle and engine shed. Within the yard the focal points are the enginehouse at the center and the depot at the east end.  A canal bisects the yard providing a visual break and some varying elevation in an otherwise flat surface. 

The track plan.

The 1st draft layout plan in BlueBrick

I opted to make Littlefield’s crossing my westernmost scene instead of the Androscoggin River Bridge.  The Androscoggin River Bridge is about 360 feet long which works out to be 9 baseplates at this scale.  Building the bridge and the river itself would be a pretty significant undertaking, and in my opinion not as visually interesting as some of the other scenes on the line.  I felt like the truss at Littlefields could convey the impression of a bridge at the west end of the yard, but also serve the purposes of representing a scene further down the line.  I’m going to try to put the track and roads at an angle like builder MTM-MD does with some of his creations to make the scene more interesting. 

The yard itself I’ve applied a generous amount of selective compression.  I have an 8-foot long banquet table to use, which pretty much decided how much space I have for the yard.  Full 1:48 scale, the yard would be a good 25 baseplates in length, and I’d guess maybe 10-12 deep, which while super accurate is highly impractical for my basement (and my marriage!)  The structures will be compressed to about 75-80% scale size which allows them to both fit in this smaller space and saves my budget for the project whilst still creating the impression of being full scale.  The northern sidings with their various industries will have to be represented by some short 1-2 car sidings and façade structures.

One shortcoming with this plan is the track is squeezed so tightly that the northern bay where the locomotive would park will have to be non-functional.  This won’t impact switching operations though.  The other shortcoming is that this uses R40 switches which aren’t very realistic looking and may give my 713 model some problems.  Given the price of printed R014s and my space currently available, I figured this could wait for another day.

The Lewiston Depot today. The signage painted on the brick in the early 20th century is still visible.

In the end though, I have 7 spots for switching cars, a spot for the combine, and plenty of space for building up the return train to Lewiston.  The basement is cleaned up (mostly.) and the tables are in place.  Now it’s time to hit the brick.

Prague Main Railway Station, a Diorama

Railway Stations are massive things, definitely in the scales we as Lego Trainheads are building. A great example is Cale’s post about the PennLUG Lines, which shows that a Main Railway station easily rivals with its Staging Yard when it comes to size. However, that doesn’t mean you should not try building one. And thanks to The Lego Company (TLC), there is now a great example you can visit, as long as you are willing to travel to Kladno, Czech Republic. More specifically, we are talking about a model of Praha hlavní nádraží, the main Railway Station of Prague.

Praha Hl.N.

Thanks to a link shared on the Lego Train Fan Club page over at Facebook which caught my eye, I started to do some more research to find out as much as I could about this Diorama. There is a good reason for that: Having lived in Prague for two years and being in that station on almost weekly basis, it’s very close to me. Everything that makes Praha Hl.N. the station I love is there: The old station building, the Magistrala (the highway in front of the Railway Station), the new railway station and its interior (visible in front of the highway), the metro, and the actual double canopy above the tracks.

It turns out it’s not only a great model, but it even has running trains (one Shunter, one Main Line Locomotive which is about to couple with a rake of Intercity coaches, and a Metro!), moving elevators, lights… You name it, it’s there!

Continue reading Prague Main Railway Station, a Diorama

Research – Where does he get those wonderful toys?

Over on our Facebook page, reader Martijn van der Linden asked a great question about where, exactly, some of us find our research material while building.

My short answer was, everywhere.

For a longer answer, here are a few of the places that I look for information and inspiration.

  • Online: The Internet has, literally, the world’s knowledge at our fingertips. The difficult part can be sorting out useful information from not-so-useful information. I tend to follow some of the scale-modelers websites, some modeling blogs, and a lot of Facebook forums that include information on the railroads or scales that I am interested in.
  • My Personal Collection: I’ve been collecting information on trains for a number of years, so I have a decent collection of books, magazines, and photographs that I’ve picked up along the way. Much of this was second-hand, either from modelers who were leaving the hobby, or from train show vendors with good deals.
  • Libraries: Everything I have in my personal collection can be found in libraries. Here in rural Vermont, libraries tend to be small, so I may need to look in more than a few for the information that I need, but it’s usually worth it. Many libraries, especially the small local ones, haven’t had their collections digitized, so you’ll often find information that you can’t find online.
  • Historical Societies: A number different organizations have historical societies who collect and sometimes publish information about the past. In my case, The Rutland Railroad Historical Society publishes a quarterly journal that contains photos, drawings, and sometimes interviews with past railroad employees. This gives me a wealth of information about that particular railroad. Outside of the Rutland, I also like to visit town historical societies. A lot of times these small places will have photos and documents that, like small libraries, can’t be found online. Some will even have museums with artifacts from the railroad that you’re trying to model.
Rutland Flatcar
Rutland 2762 with its real-life inspiration at the Danbury Railway Museum
  • Museums: Museums are amazing places, ranging from the small town ones mentioned above, to the big railroad oriented ones like those in Strasburg, Pennsylvania. Several years ago I had a train display at the Danbury Railway Museum with a couple of friends. As it turned out, their collection of rolling stock included two Rutland cars that were being saved for preservation. I was able to get detailed photos of the cars, and chat with a couple of the guys who helped moved them originally.
  • Train Shows: Train shows are my version of the best holidays. Surrounded by hundreds or thousands of other train fans, browsing through tables of products ranging from brand new to decades old, I always find inspiration. A couple of the large shows that I attend include collections of photographs, where I can sometimes find photos or drawings that have never been published before. I generally can find a book or magazine to add to my personal collection as well. A lot of the attendees go there to buy models. I go to attain information.
  • Other Modelers: Many of my friends are modelers, and most don’t focus on the same things. For instance, while I tend to collect information about the Rutland Railroad, I know that if I ever need information about the Ma & Pa, Cale would be a good source. My friends also model in different scales, so I can, for instance, ask my Live Steam friends how a particular boiler arrangement might work, or an HO modeler where to find information about older diesel locomotives. Some of these friends have, or do, work for the railroad, so they can sometimes give me information based on experience.

For a few specific places that I like to look online, here are some links. Keep in mind that I’m a northeastern United State modeler. Other countries may have other sites worth looking into.

  • Steam Locomotive Dot Com – Includes builder’s photos, specifications, and locations of existing equipment.
  • Fallen Flags and Other Railroad Photos – Photographs and manuals, organized by road name.
  • Railpictures.net – User-submitted photos from all over the United States, searchable by road name, locomotive type, and location.
  • Google Books – Digitized books going back to as far as the 1700s. A couple of my favorites are the Car Builder’s Cyclopedia’s, and some of the Railroad Structures books. You can also sometimes find railroad timetables, and industry information from the time-period.

The Lewiston Branch in L-Gauge: Introduction

Much like Elroy, a scant 50 miles from me on the other side of the green mountains, I’m a huge fan of incorporating realistic railroad operations in minimal space with my Lego trains.  Our influences are the same, Model Railroader and the old Railroad Model Craftsman magazines, the late Carl Arendt’s micro layouts website, and the Trevor Marshall’s Port Rowan in S Scale blog.  I’ve built a number of L-Gauge operating layouts over the years such as my freelanced Port Lego – North Bay, an Inglenook based on the BR Railfreight Distribution of the 80s, and even a tiny switching layout based on modern Claremont and Concord Railway operations in Claremont, NH. 

Continue reading The Lewiston Branch in L-Gauge: Introduction

A follow-up on a follow-up

After Elroy followed up on my article about scaled Lego Trains within an already scaled L-gauge environment, this time around with a moving example, I had to follow-up on that one again. For good reasons though. Just check out the video and see it for yourself.

Miniture Train Video – by Alexander

Of course all credits go to its builder, Alexander.

Continue reading A follow-up on a follow-up